TUTORIAL
- 1 - Introduction to Cosima (0.9b)
- 2 - Installation of Cosima, IrfanView and customizing Windows Explorer
- 3 - The short story - quick start tutorial
- 4 - Running Cosima and some special recipes
- 5 - Recipes - specifications and downloads
- 6 - Adjusting parameters - making your own recipes
- 7 - IrfanView tips
4 - Running Cosima (0.9b) and some special recipes
by Jørn Lang
- 4.1 Running Cosima
- 4.2 Cosima in three steps
- 4.3 Download test images
- 4.4 First test - scanned TGA-pair
- 4.5 Files added after mounting
- 4.6 Second test - scanned JPG-pair
4.1 Running Cosima
Cosima does not have a graphical user interface, but the ini-file containing the parameters represents the "menu" of Cosima and consists of 7 logical groups. Double-click cosima.ini to view or edit the settings. More about this in Making your own recipes.
The parameter groups:
- General Parameters for program settings
- Input Parameters for specifying properties of input images
- Video Parameters for image properties, possible to repeat corrections for a chosen number of images
- Equalizing Parameters includes stereo window settings, colour balance, colour management
- Output Parameters output size, side-correct or interchanged, mirror output
- Anaglyph Parameters black and white, coloured or half-coloured, brightness and colour tuning
- Parameters for external programs including manual setting of the stereo window, setting of jpg-quality, exif transfer
Drag-and-drop to start Cosima
The most flexible start of Cosima. The "drag-and-drop-start" allows using customized ini-files with a descriptive file name. In this tutorial these ini-files are sometimes refered to as "recipes" and sometimes just as "ini-files". Just drag and drop the chosen recipe on "cosima.exe" and Cosima starts.
For other (advanced) start-methods see the online help.
4.2 Cosima in three steps
- Copy* any number of image pairs into the folder of the ini-file**.
- Make sure, the images match the specifications inside the ini-file. (Shooting style, file-type and / or name pattern et cetera).
- Drag and drop the chosen ini-file on "cosima.exe" and follow the on-screen instructions.
*Of course you can choose "move" instead of "copy". Copy is chosen here so your originals will just stay where they are, and you simply delete the copies when the stereos are finished. (By the way, check that you have removed any left-over images from previous mountings!)
**This is the default, but can be changed with the "RootDirectory" parameter. Images from double digital camera rigs (InputMode = 9) should be put in separate sub-directories named respectively "l" and "r".
4.3 Download test images and 5 recipes
Before continuing, you may want to download the zip-file 09b_cosima_tutorial_files_1.zip (2.6MB) with some example images.
You can also download the package of 1 TGA pair Hummel.zip (2.11MB).
4.4 First test - scanned TGA-pair
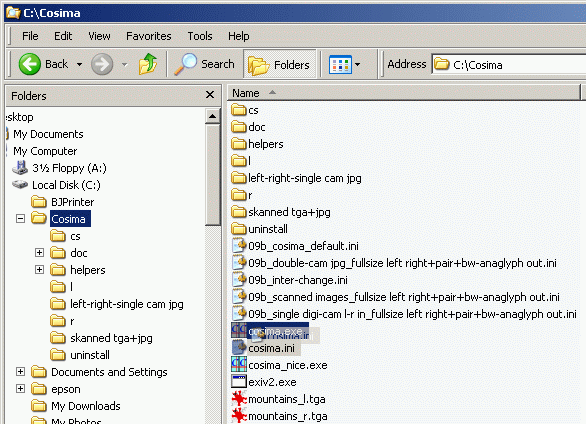
- Copy the 2 TGA-files from the "scanned" folder of the downloaded images into your Cosima-folder. (Customize explorer, if the file-endings are hidden).
- Drag and drop cosima.ini onto "cosima.exe"
- Cosima will open in a black window. Follow the instructions on the screen.
Cosima will start and you will see this window (unlicensed version):
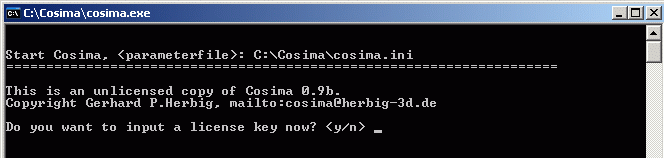
Type "y" for yes or "n" for no and hit your "enter" key. If yes, follow the same procedure for license number.
Cosima starts:
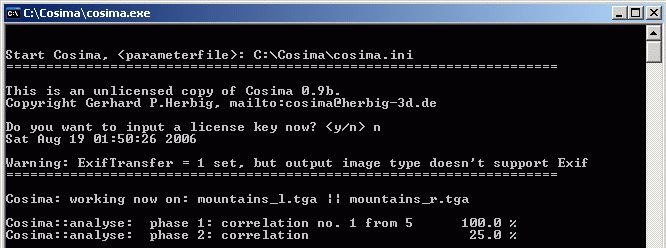
The time Cosima spends on the test images will depend on your computer, on the images and on the settings of the ini-file. All the test images with the preset ini-files should be ready in few minutes for each pair. Press the enter key when Cosima is finished.
Cosima will by default make two separate images for left and right, one side-correct stereo pair and one black and white anaglyph. The images will by default be saved in the folders (respectively):
| C:\Cosima\cl\ | (corrected left) |
| C:\Cosima\cr\ | (corrected right) |
| C:\Cosima\cs\ | (corrected stereopair) |
| C:\Cosima\ca\ | (corrected anaglyph) |
4.5 Files added after mounting
Cosima will by default also save some files in the folder of the ini-file used.
- In the cosima_report(...)-file you will find an analysis of the images before and after mounting, including detailed information on the deviation of the images. This can be of great help for evaluating the stereoscopic qualities of the image pairs.
- The "cosima_files.txt" will contain a list of the files mounted.
- If Cosima is closed before finshing you may find the files cosimatemp and / or i_view32.ini
If you don't need these files, you can delete them.
4.6 Second test - scanned JPG-pair
Copy the JPGs from the folder "scanned" into your Cosima-folder. (Remove any left-over images from your Cosima-folder.)
Download the ini-file 09b_scanned images_fullsize left right+pair+bw-anaglyph out.ini". Thendrag and drop this ini-file onto "cosima.exe".
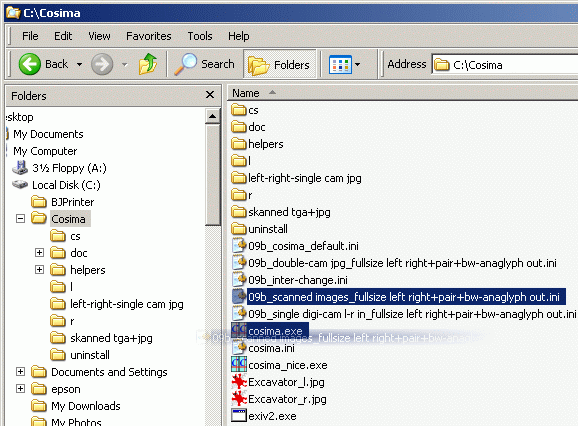
Like before, Cosima will open in a black window. Follow the instructions on screen.
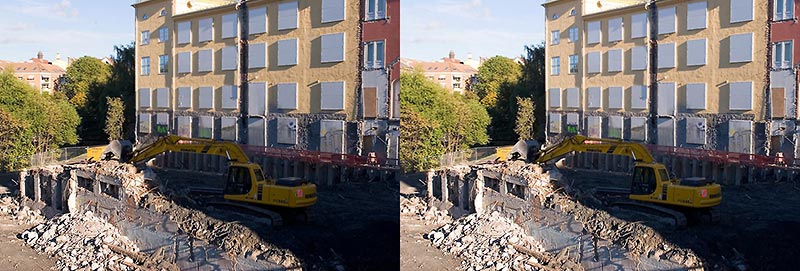
Excavator, photo by Jørn Lang.
Next section: 5 - Recipes - specifications and downloads
Back to the Cosima homepage: www.herbig-3d.de/cosima/
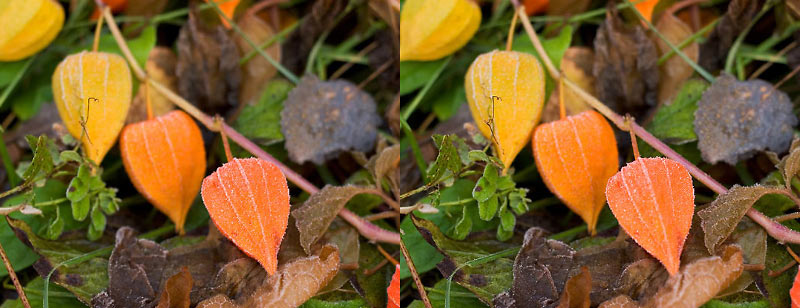
Chinese lanterns, photo by Jørn Lang.